Set up and AssemblyUpdated a month ago
Boogie Assembly & First Use Guide
Assembly
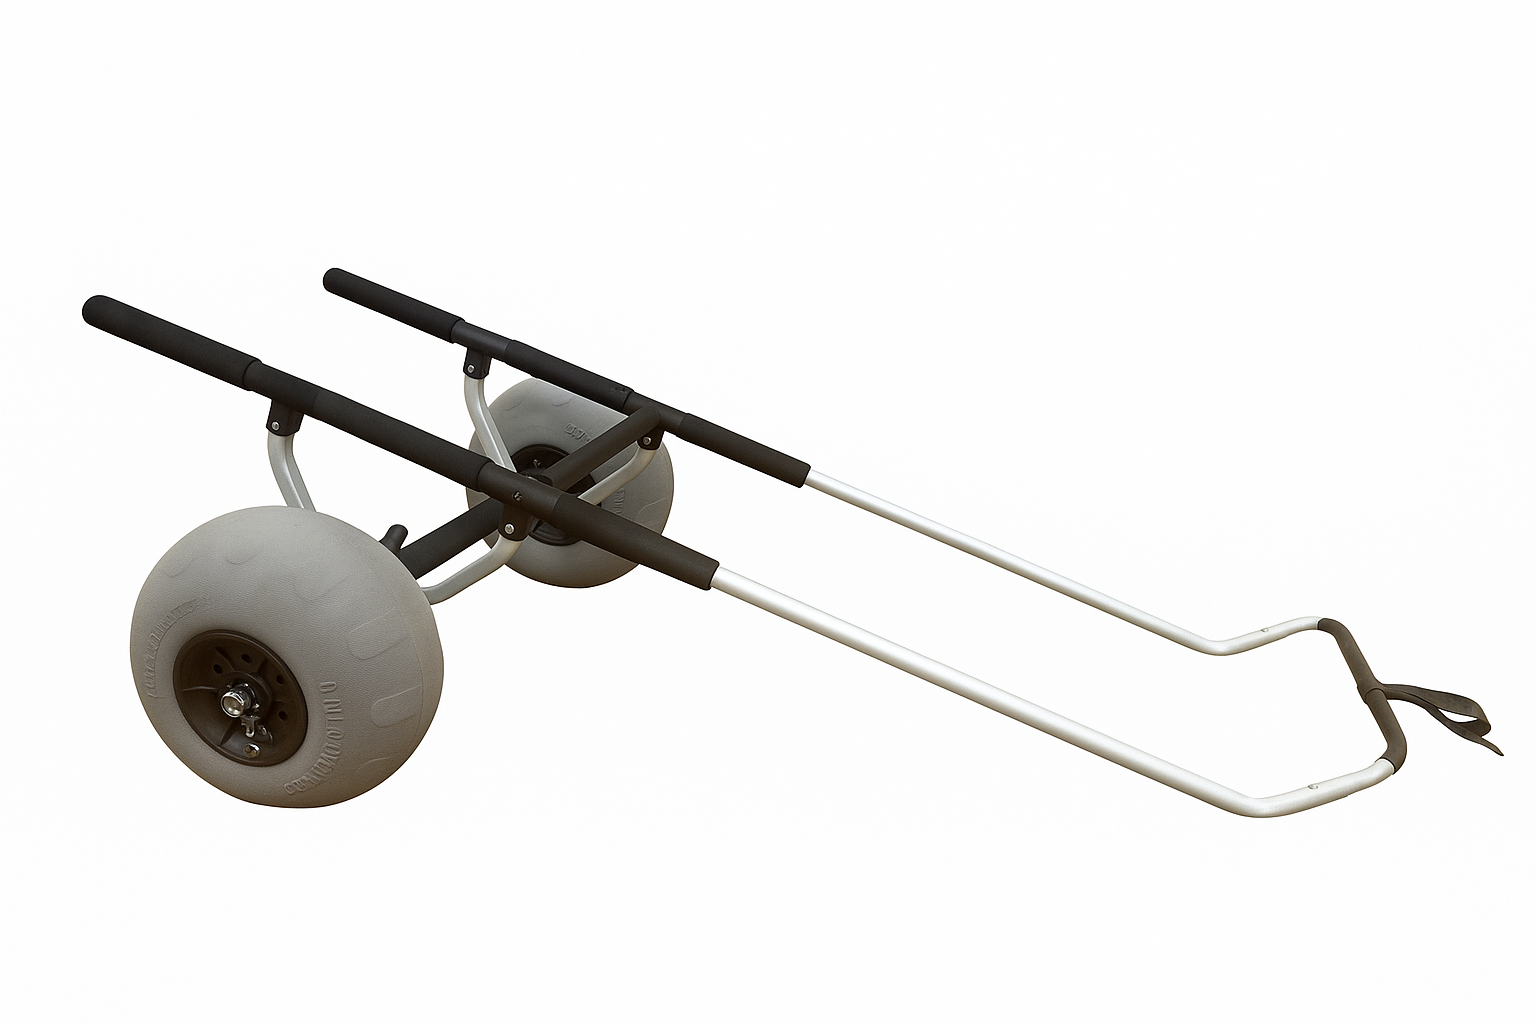
Assemble the Trolley First
Inflate the tyres using a bike pump. Do not over inflate otherwise they will bulge in the sun. Use the cardboard cut outs for the correct size.
Assemble the trolley as per the photos. Some WD40 or oil will make the self tapping cross bar screws go in easier.
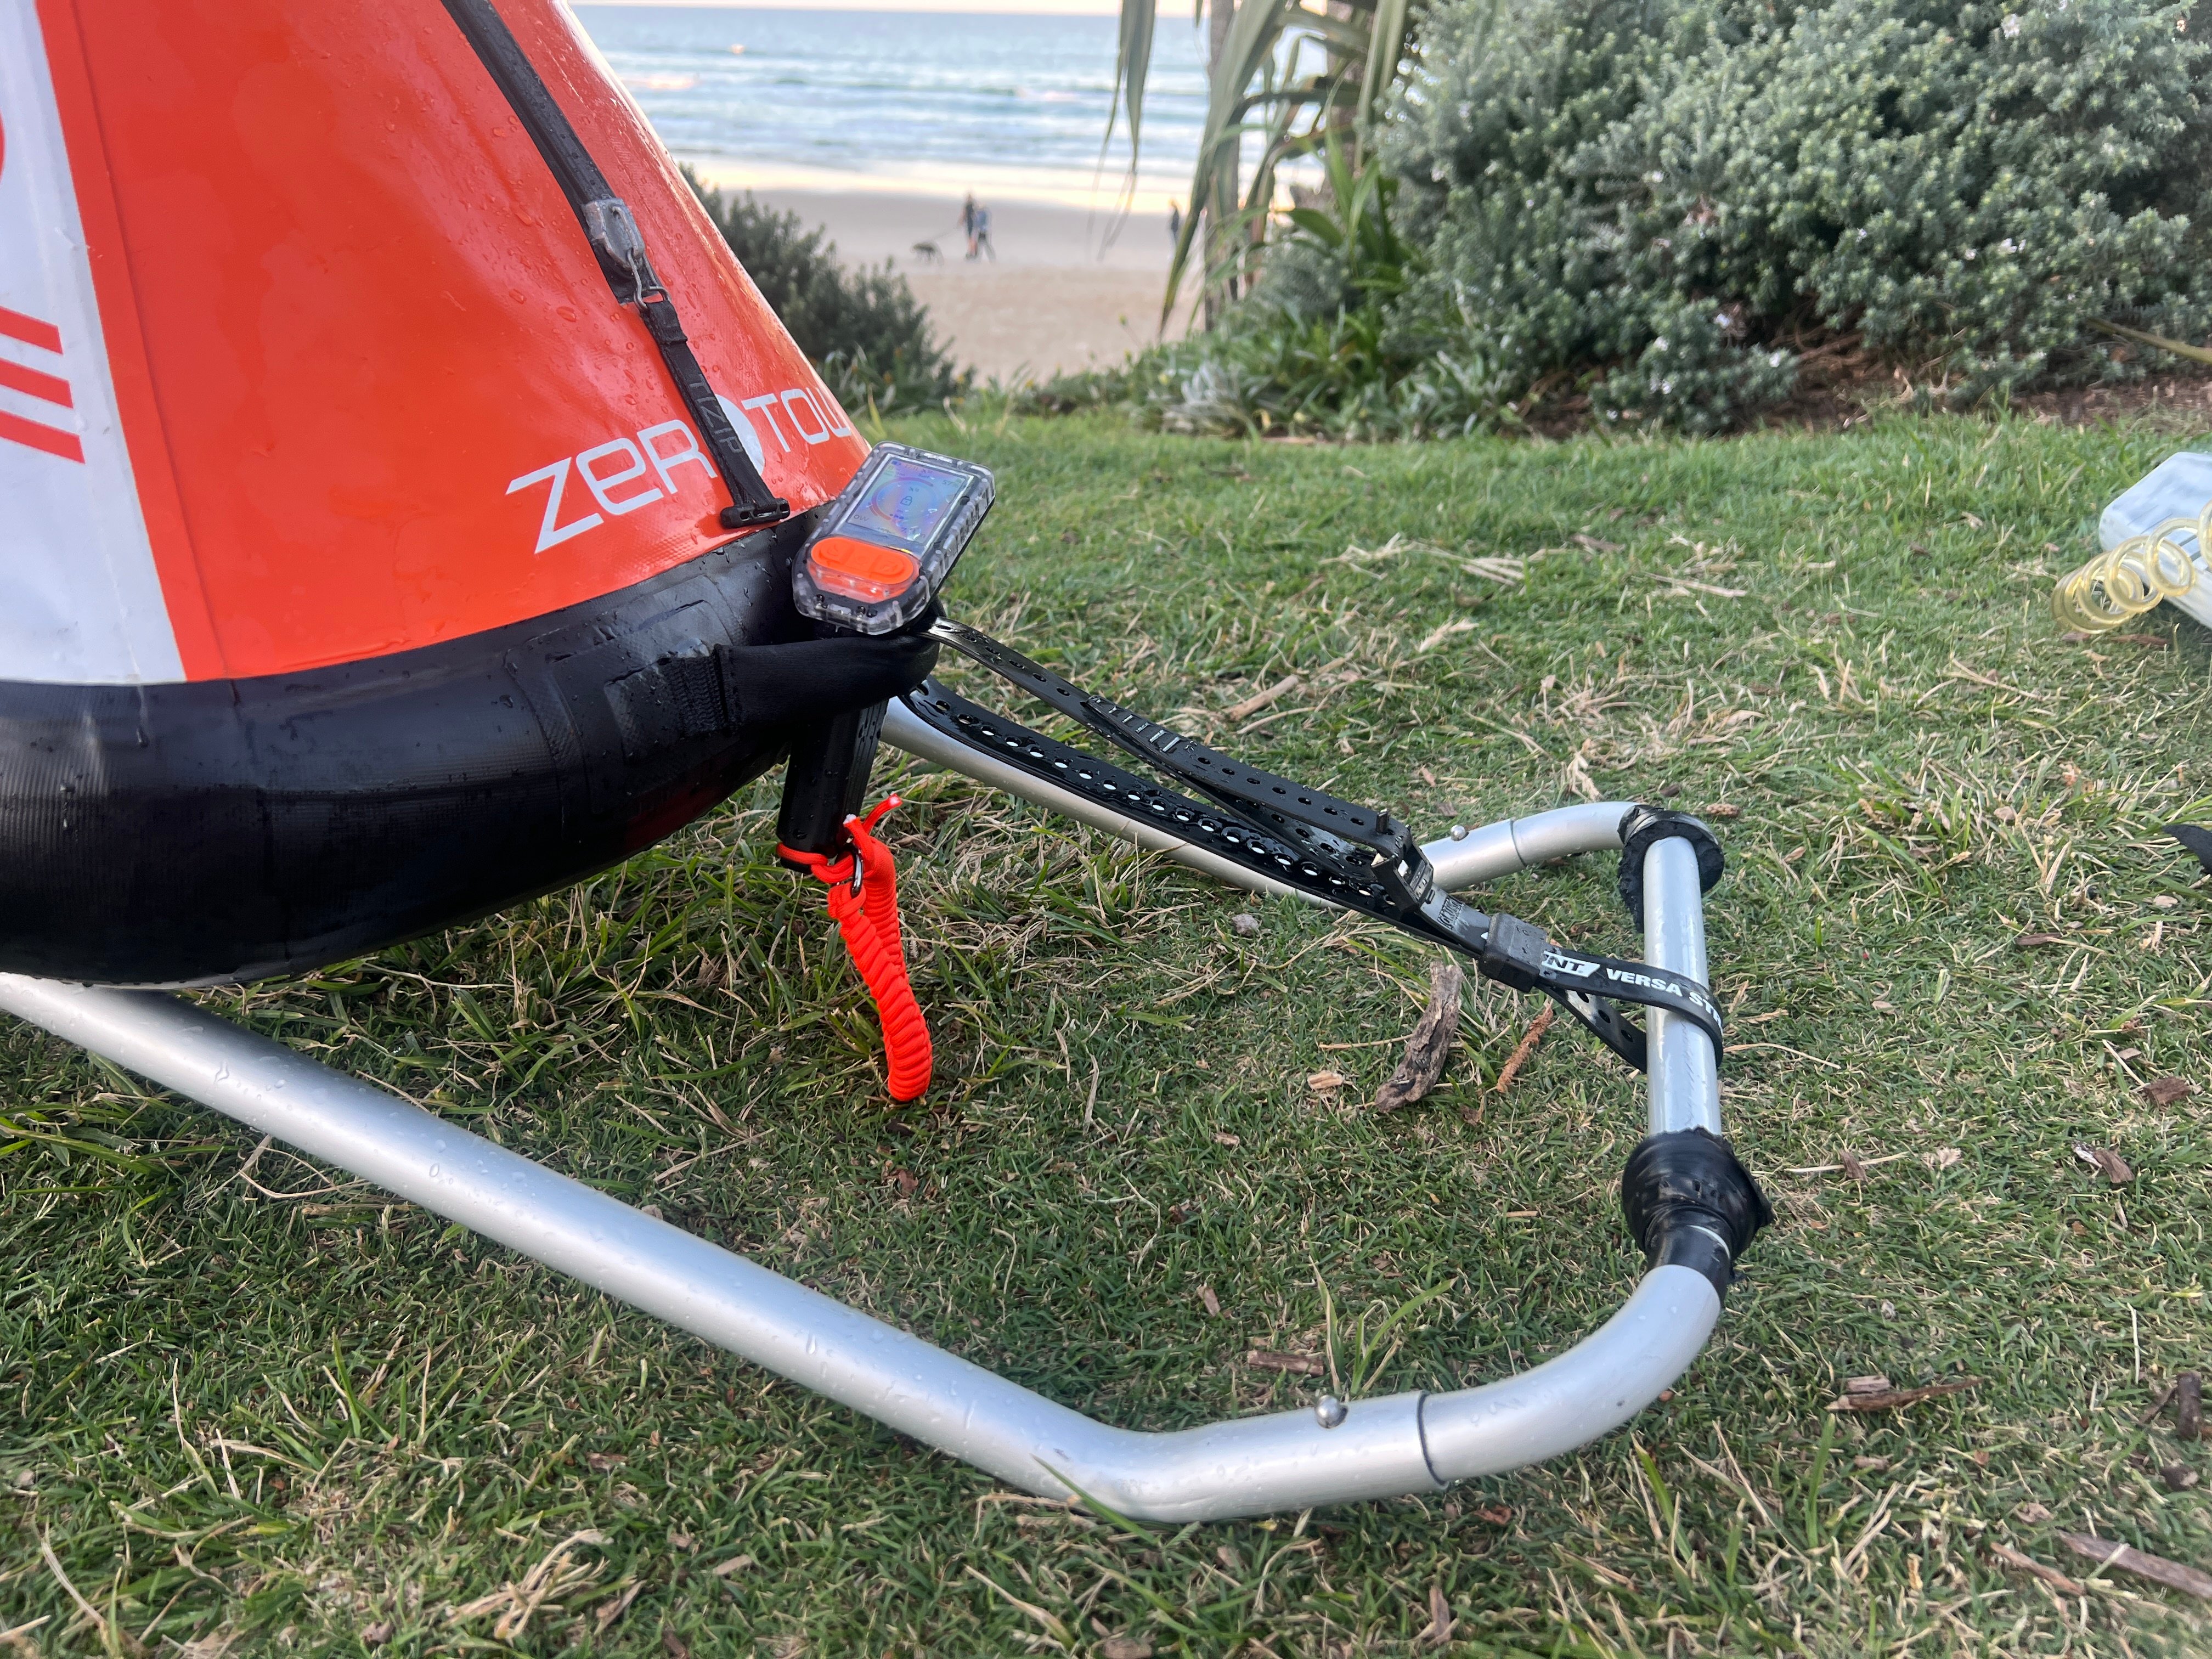
 Remove the strap from the front handle of the Boogie and put it around the handle of the trolley. This is all that is needed to secure the Boogie to the trolley for transport and makes launching easy.
When walking to the beach, place the remote in the front handle of the Boogie and turn it on to get GPS reception while walking to the beach.
Use the trolley as a stable platform to inflate the Boogie and install the battery
Unpack the Boogie
Unfold the Boogie and lay it on the trolley.
The remote is packed inside the Boogie for shipping.
Opening the Zip
Open the zip carefully — it may be stiff during the first few uses, and is a little awkward with the Boogie deflated. Hold the front handle of the Boogie and pull the zipper slider directly backwards.
This zip is waterproof and airtight, so it’s critical to:
Keep it clean – avoid sand at all costs. Never open or close it on a sandy beach.
Keep it lubricated with silicone grease
Always close it when not in use.
Ensure the zip is fully sealed – visually check that all teeth are engaged before going in the water.
More information on zip care and troubleshooting can be found here.
Inflate the Hull
Start by inflating the hull to ~1 PSI.
Position the Control Box:
It has rails that need to sit under the inner walls of the hull.
Position the hull so the top edge of the Control Box is level with the top edge of the hull on both sides.
Finish inflating the hull to 10 PSI.
Do NOT exceed 10 PSI.
Do NOT leave the Boogie inflated over 10 PSI in a hot car.
Install the Prop
Turn the Boogie over and use a 13mm socket to install the prop.
The pin must go through the hole in the shaft and locate in the shallow recess of the prop.
Failure to do this will damage the tail cone and require replacement.
The nut need to be firmly tightened. If it is loose the prop can slide backwards and the pin will fall out and you will be swimming home!
Install the Battery
Insert the battery with the handle facing the Control Box and the label facing up.
Carefully move the straps out of the way during insertion to avoid hull damage.
Strap the battery down securely — but do not overtighten. If you over tighten you can damage the D-rings that hold the battery in place.
If conditions are rough, or the Boogie needs to make it out past the shorebreak place a rolled up beach towel between the battery and the straps, and wedge the remote case in front of the battery. This will help lock the battery in place more securely.
Ensure the battery is OFF, then:
Connect orange to orange
Connect black to black
Once Connected, turn the battery ON
Close the zip.
More battery details are Here
- Reversible Cover
- Use the included reversible cover to limit sun exposure to the Boogie when not in use. If it is hot day, use the cover with the silver side facing outwards.
- If it is really hot, or the Boogie has items placed on top of it, the silver coating can rub off and mark the the white PVC. Brake cleaner can be used to remove these marks.
Before First Use
Firmware Update
Ensure both the Boogie and Remote are running the latest firmware.
Instructions are available here.
Keeping firmware up to date is a warranty requirement.
Setup Before Use
Power On
With the battery installed and connected, turn the battery ON.
The Boogie will calibrate the steering automatically.
It is important that the motor does not get stuck or obstructed during calibration, otherwise the motor will not be centered and will pull to one side when towing.
If this happens once you are in the water you can reboot the Boogie from the remote. settings > firmware update > reboot Boogie
Check Remote
The Remote is pre-paired with the Boogie.
Turn on the Remote and verify connection.
Check Antenna Position
Ensure the Boogie’s antenna is vertical.
If not, range will be significantly reduced.
The antenna is fragile - do not pull on the antenna.
Top Shell Inflation
Inflate the top shell to about 1 PSI.
Overinflation will:
Damage the Boogie
Cause poor handling
Result in porpoising
As a guide, 1 PSI is roughly the maximum amount of pressure you can generate by blowing with your mouth.
Ready to Ride?
When you’re ready to take your Boogie out for the first time, make sure to read First Use Guide for essential safety and handling tips.